Monday, December 27, 2010

Reflections and French herbed chicken


It's been nearly 6 months since I took the challenge to cook recipes from the Cooking Class cookbook. I've not quite been keeping up with my challenge of cooking 105-odd recipes in 52 weeks, as life has been getting in the way.

Anyway, Christmas is a good time for cooking and it's been an opportunity to cook from the Cooking Class cookbook, particularly as Christmas means visitors coming to eat. Today saw D's grandparents come over for lunch, so a quick look at the cookbook found an old favourite located on Page 7, namely the French Herbed Chicken. This is a great variation on the traditional roast chicken with stuffing, where the chicken is roasted 'French-style' with herbed butter stuffed under the skin of the chicken breast.

Making the French herbed chicken is easy. First, get a good, free-range size 15 chicken (we used a size 18 chicken) and prepare the chicken breast by gently easing the chicken skin away from the breast meat with a teaspoon (rounded side up), making sure not to break the skin. Once you've done that, preheat the oven to 200 degrees Celcius.

A picture of the chicken in a state of rawness

Step One involves making the herbed butter. First, rest 90 grams of butter at room temperature. Roughly chop the butter and add it into a food processor, along with 2 tablespoons of chopped parsley and 3 finely chopped shallots along with 1 teaspoon of french mustard, 1/2 teaspoon of tarragon along with salt and pepper. Process everything together until combined. Then spread the herbed butter with a small spatula or spoon beneath the skin to cover the whole chicken breast.

The bacon, onion and butter for the stuffing mixture cooking in the pan

Step Two is preparing the stuffing. The recipe calls for 2 1/2 cups of breadcrumbs (but I would say 1 1/2 cups of breadcrumbs is enough to stuff the chicken) in a bowl along with 1 egg, 1/2 teaspoon of thyme and 2 tablespoons of chopped parsley. Then heat 60 grams of butter in a frypan, add 2 rashers of bacon, chopped and 1 small peeled and chopped onion. Saute everything in the pan until the onions are soft. Add this to the crumb mixture and mix well, seasoning with salt and pepper. Stuff the mixture into the chicken and close the cavity with toothpicks.

The chicken in a state of readiness for cooking

Step Three is getting the chicken in the oven. Put the chicken in the baking dish and add 1 cup of dry white wine (I used some Grampians Estate's Garden Gully Riesling), 1/2 cup of water, 30 grams of butter and one chicken stock cube. Bake the chicken uncovered in the oven for 1 hour and 50 minutes or until cooked, basting frequently with pan juices.

Taking the chicken out of the oven begins Step Four. Take the chicken out of the baking dish and let it rest before carving. This will give you the time for making the sauce. Heat up the pan juices in the baking dish and bringing it to the boil for two minutes, then remove from the heat. Stir in 1/2 cup of cream and 1 tablespoon of cornflour. Return to heat and stir until sauce boils and thickens. Season with salt and pepper. Carve the chicken and serve with the stuffing and a selection of roast vegetables and steamed vegetables. Don't forget the put on the sauce either. It was delicious and should serve 4-6 hungry people. The chicken served 4 people today with meat left over for later on.

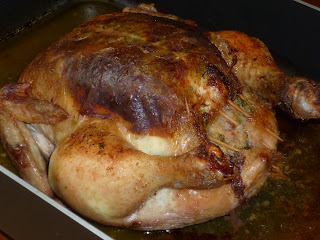
The chicken cut up and ready to be served
Saturday, October 23, 2010

March of the Gingerbread men


A few weeks ago, we had our niece over to stay for the weekend. She's 6 years old, likes to cook and she likes to be a helper, so it was pretty straightforward getting her help to make a batch of gingerbread men. This is another easy recipe, requiring only a few ingredients and is a good one for older kids to help out with in the kitchen, especially the sifting, mixing, cutting out and decorating. Ingredients are:
  • 125g butter
  • 1/2 cup caster sugar
  • 1 egg yolk
  • 2 cups plain flour
  • 1 teaspoon bi-carb soda
  • 3 teaspoons of ground ginger
  • 2 1/2 tablespoons of golden syrup
  • currants
  • glace cherries
  • sweets to decorate (I used Smarties)
To make the mixture, cream butter and sugar until creamy. Add the egg yolk and beat well. Then add the sifted dry ingredients and the warmed golden syrup. Mix well until combined into a dough.

Knead the mixture lightly and roll out to about 3mm thickness on a lightly floured board. Once rolled out, cut using a floured gingerbread man cutter, as shown below. This sized cutter with the quantities of dough from the recipe produces 8-10 gingerbread men. 


Then lift the shapes carefully and arrange them on a greased baking sheet. Now comes the fun bit - decorate the gingerbread men using the currants for eyes and pieces of glace cherry for noses  My helper below did a great job in decorating the gingerbread men, don't you think? 


Once ready, bake in a moderate oven for 15 minutes. When done, remove from oven and cool on the trays. Once cool, transfer to a wire rack for further decorating. We used Smarties cut in half for mouths and whole Smarties for buttons. A little dab of jam helps act as 'glue' to hold the Smarties on to the gingerbread men. You can of course, also eat the Smarties you don't use. 


Having done that, there's not much more left to do than make a nice cup of tea or coffee (or a glass of milk for the young 'uns) and enjoy.


I hope readers like this recipe. I certainly did as I haven't had a homemade gingerbread man since I was a boy many, many years ago.

Monday, September 20, 2010

Brandied oranges - the ideal weekend dessert

Brandied oranges with vanilla ice cream

Last night being Sunday night, we were looking for a dessert to go with Alvin from Masterchef's caramelised pork belly recipe. Thankfully, the Women's Weekly Cooking Class Cookbook came to the rescue with the recipe for Brandied Oranges (p. 96).

The upside to this recipe is that it's one of the easiest recipes I have ever, ever made. The downside is that there's lots of messy and time consuming preparation work. The results however are delicious. Here's the ingredients:

8 oranges
1 1/2 cups of water
1 cup castor sugar
1/2 cup of brandy
1/2 jigger of Cointreau or Grand Marnier (I used Grand Marnier)

Now, this is where I broke with following the recipe and went my own way.

  • First of all, combine in a saucepan 1 1/2 cup of water and 1 cup of caster sugar. Stir until dissolved while bringing to the boil. Once the mixture has boiled, take off the heat and leave to cool.
  • While the sugar syrup is cooling, use a sharp knife to peel the oranges down to the flesh, removing all the rind and pith on the oranges. Don't be afraid to cut deep and clean up any remaining pith. Make sure you peel the oranges over the bowl so as to save all the juice. They should end up looking something like the oranges below:

8 peeled oranges
  • Now, cut the oranges along the white membranes and separate them into segments. The real fiddly bit is taking off all the membrane around the segments so that you're left with the beautiful, soft flesh. Again, make sure that you segment the oranges over the bowl so that all the juice is collected in the bowl. 
  • By now, the sugar syrup should have cooled down, so now is the time to add the brandy and orange liqueur and stir until combine. Have a taste to make sure it's OK! 
  • Finally, pour the sugar syrup into the bowl of oranges and stir gently to combine. Cover with cling  wrap and refrigerate until ready.

To serve, spoon the orange segments and the syrup into serving bowls or glasses and top with a good quality vanilla ice-cream or whipped cream and serve. I can really see myself making this for summer BBQs and easy weekend dinners.

The finished product!
Give it a try yourself and tell me what you think. Bon Appetit!

Monday, August 2, 2010

The challenge of chocolate mousse

Chocolate mousse - ready to serve

The making of chocolate mousse this weekend was a challenge on a number of levels, although in itself chocolate mousse is not a difficult dish. The secret is ensuring the elements are not over whipped or beaten so that they combine, but retain their lightness and fluffiness when refrigerated.

Firstly, getting started again on the Cooking Class Cookbook project after a fewweeks of culinary apathy was the biggest challenge that Scott had to face.

Secondly, this was the weekend that our niece was coming to stay over - she likes to help cook and this meant Scott had to find a recipe that would work well for a 6-year old to assist with. It was thought chocolate mousse, with relatively few (4) steps and a minimum of danger (aside from melting chocolate and using an electric mixer) would be well within the capabilities of both Scott and his assistant.

So without further ado, let's get down to business!

Ingredients are simple, namely:
  • 125g dark chocolate
  • 1 tablespoon brandy
  • 4 eggs, separated
  • 1 cup of cream, extra for serving
The recipe says it will serve 4. These servings are quite large, so you can also serve 6 with slightly smaller servings.

Step 1 - melt the chocolate in a double boiler over simmering water. Once melted, take the chocolate off the heat, allow to cool slightly and stir in the brandy then the egg yolks. Beat until the mixture is smooth and thick.

Step 2 - Whip the cream, taking care not to overwhip, otherwise it will be hard to fold in the cream. Once whipped, fold the cream into the chocolate mixture.

Step 3 - Whip the egg whites until soft peaks form, making sure again not to overbeat them as this will make it hard to fold them in.

Step 4 - Fold in half the egg whites into the chocolate mixture, then fold in the second half of the egg whites. Once combined, spoon the mixture into either 4-6 individual dishes or one large dish.


Step 5 - Refrigerate the mousse until firm. To serve, whip some extra cream and place on top of the mousse and shave chocolate over the top of the cream/mousse. (Tip: Use a vegetable peeler to grate the chocolate - this gives chunkier shards of chocolate.)

Step 6 - EAT!!!!!


Sunday, July 4, 2010

First, turn to Page 12, or Coq au Vin

Scott has never been one to do things in order. As his friends (and his wife) will tell you, orderly is not a word you'd normally associate with him. So rather than start on page 2 (Beggar's Chicken), he turns to Page 12 (Coq au Vin) to begin his exploration of the Cooking Class Cookbook.

The dish is, however perfect for a cold Sunday night in winter and has the advantage of being able to be refrigerated and served again for lunches and mid-week dinners. At heart, Coq au Vin is a chicken casserole that is built around bacon, shallots (or small onions), mushrooms, garlic, chicken and a sauce made with lots of butter, thickened with flour and chicken stock and flavoured with wine, brandy and herbs (thyme, bay leaves, etc).

Things were a bit touch and go for Scott as he cooked the Coq au Vin with the thickening of the sauce going a bit crazy and ending up needing to be remade. This was because out of deference to his wife's fructan intolerance, he used gluten-free flour instead of wheaten flour and the sauce went gummy and goopy, more like some sort of advanced polymer than a browned butter sauce thickened with flour and water. So the original sauce went in the bin, to be replaced by a sauce remade using cornflour (made from maize) which turned out relatively normal. Even so, it was still too thick and needed to be thinned out with more chicken stock.

Scott made the Coq au Vin early in the afternoon, which allowed him to go and do a couple of hours of work on the windows in the second bedroom before putting it in the oven. He served it on a bed of creamy mashed potatoes with steamed broccoli and carrots on the side.

There was enough time for Scott and his wife to enjoy dinner in front of the TV watching MasterChef and complain about how almost none of the contestants know how to do 'home style cooking'.

Delicious meal and not bad for the first effort. Scott asks you to stay tuned for the next installment.

Why might Scott be able to cook?

Scott is almost 40. He can cook, but not as well as his wife can. His repertoire is limited to BBQs, roasts, salads and the odd dessert. He also does a very good mashed potatoes.

Scott wishes to cook and cook well. His wife bought him a Kitchen Boot Camp course at the CAE as a Christmas present. This motivated him to be a better cook.

He is also inspired by the way Bill Granger learned to cook using Women's Weekly cookbooks.

So today marks the start of his efforts to unleash the inner culinary artiste within. From today, Scott will start cooking from the Women's Weekly Cooking Class Cookbook. There are 105 recipes and processes Scott will need to master. He will give himself a year to produce all of the culinary delights and processes within the cookbook and display them for you pleasure.

Let me be your guide as Scott learns how to cook. Itadaki masu (enjoy your meal)!